Microworlds Virtual Animations - Virtual Flipbooks


The holidays have come and gone, and I do hope you all had a blast with the food and the family and the who-ha, but I gotta catch up on what happened over at Panther between Thanksgiving and the Holiday Break. During this time, I learned alot. I found I was reletively unprepared and uneducated about Microworlds, which would have hindered the learning process of the kids if not for Gabe's help and pacing the lesson plans. By seperating the activities into smaller lesson plans with goals to be reached by the end of the period, goals that taught only one or two steps at a time, the program did not seem as intmitating to most. Because of this, I believe we had a successful few weeks with this software. However, you have been forewarned, a well thought out lesson plan should be prepared when teaching Microworlds, and hopefully through the next few blogs DesignIT can learn frommy mistakes, and the many improvements and adjustments I will suggest.
Microworlds Virtual Animations - Virtual Flipbooks
Big Idea: Encourage confidence in computer programming and provide a new creative medium through the exploration of Microworlds.
Dates: Monday, November 28th
Groups Participating: Panther Boys and GirlsClub DesignIT Students
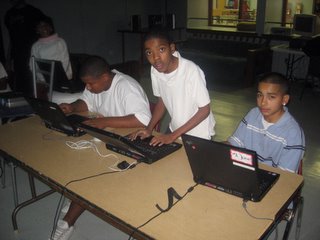
Attendance: 5 Students - Michael, Leanthia, Marcus, Jonathon, and Eddie
Software: Microworlds
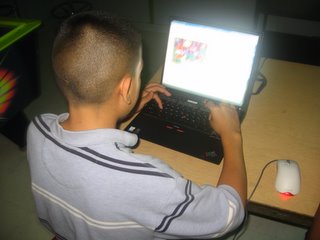
Hardware: One laptop and and one mouse per student
Directions: *NOTE* Arrive early. I found the best way to get as many students interested as possible was to arrive before they did, set up the laptops, turn them on and open the program, and if I had something to show them over the digital projector first, I closed the laptops until I was through. Because I had just taught how to build actual physical flipbooks, it seemed a natural transition into Microworlds to teach them how to create thier own virtual one. This worked very well and interest seemed high right off the bat. Also, each lesson plan consisted of one or two simple concepts, and the next built off of the lastand added one or two more. This being the first lesson, its main concept was clicking, dragging and pasting scenery to create a page, duplicating that page, then clicking, dragging, and pasting a character in a differant spot on each page to create the illuson of motion. This familarized them with the pages icon which is used commonly for the various projects. Here's a quick rundown of how exactly to create a flipbook in steps...
-have the teens pick a character they would like to animate first. have them tell you outloud for group participation, bu t express they should not yet drag it onto the screen
- have them then pick a backround where thier character will be
-click the and drag the choosen backround onto the page
-re-size it to fit
-using the stamp icon, stamp it down - let them know once something is stamped it cannot be erased
-duplicate the page as many times as you need
-return to the choosen character and click and drag it onto page 2 to its starting position (page 1 should remain blank if character will enter onto screen itself). once it is positioned, stamp the character
-for each page, move the character little by little
-under "procedures" (to the right of the screen) teach them to right a command and its program so the computer will understand how to complete the command. For example...to fly (space) page1, wait 2, page2, wait 2, page3, wait 2, page4, wait 2, page5, wait 2,page6 (space) end.
-type in the command directly under the picture and press enter.
Associated Concepts: By having just done a physical flipbook, the concepts are there on how to create a virtual one. All they need is to be taught the tools. This is an easy begining to Microworlds that will start them off confidently in what may be for many, thier first time using the software, or even computer programming. And hopefully not their last.
Best Part: Upon completion of the flipbook and typing in thier command, many of them dragged friends over to show off what they had done.
Worst Part: After completing thier first one, keeping them interested in trying another was difficult (see improvements).
Improvements:
At the begining of the lesson, it may be fun and attract thier attention to watch one or two 1 minute or less animated shorts on the digital projector, preferablycomputer animated ones, to show professional examples.
Also, an improvement I wrote about when blogging about the physical flipbooks can apply here as well. Create challenges that involve subject matter. This way they're not simply creating to create, which is great, but usually doesn't keep teens inspired. Before you begin, as a group brainstorm different short scenes they could create, such as...
-proudest moment
-worst injury
-favorite place to travel/vacation
-if they could be an animal, which would they be and where would they live
-favorite spot to hang out
Then either assign these individually after thy've finished thier first one (where they picked thier characters at random), or do one of them as a group challenge, and watch them at the end of the period and see the differant interpretations to the one subject.
Finally, definately display any work done at the begining of the following lesson.
That may be all I have time for today, but they'll be more about what to do and not to do when planning the next Microworlds cycle.
Much luv, myles


0 Comments:
Post a Comment
<< Home