Friday, March 17, 2006

Northside at the Museum

Big Idea: Teens from Northside visit the Fort Worth Museum of Science and History. This gives the kids a chance to see the perks that come with joining DesignIT Studios. Being SpringBreak the kids got a break from the traditional DesignIT lesson plan. Little did they know, that they were still learning.

Date: Thursday; March15,2006

Participants: 28 Teens from the NS Boys and Girls club

Activity: Visit the museum exhibits and view and Adrenaline Rush at the Omni Theater

Best Part: The excitement of the kids as they played in the Risk! Exhibit. During the Omni some the kids felt the movie was to real.

Worst Part: Because it was Spring Break the museum was overly crowded and it was hard to thoroughly enjoy the exhibits.

Wednesday, March 15, 2006

Spring Break Workshop part 3


Big Idea: The adventure of a turtle in the MicroWorlds EX Robotics.

Time: Thursday, March 9, 2006

Partcipants: Eddie, Caroline, Marcus, David, Jared, AJ, Lauren, Sammie, and Saafir.

Activity: Saafir, our fearless instructor for the day, taught us how to play on MicroWorlds EX Robotics. For those who never played with MicroWorlds Robotics, this is a game were you can make graphics by telling the turtle the proper command. If you tell the turtle the correct instructions, he/she will do as it is told. First challenge of the day, make a square. That turn out to be quite easy. It just took a bit of directional skills and a lot of geometry. The next challenge, make a triangle. That was not too bad but it did take some trying. The third challenge, make a circle and from there a spiral circle. I was now lost. Fortunately, the teens caught on quickly and came to assist me on telling the correct commands to the turtle.

Best part: The newer DesignIT teens, did a great job on their first try at MicroWorlds.

Worst part: Our time was running out so we didn't have time to learn the other cool stuff on MircoWorlds.


The teens concentrating on the challenges.


AJ starts his exploration in MicroWorlds EX Robotics.


Marcus spiral design.


Spring Break Workshop part 2


Big Idea: Although this is Sammie and Jonathon's brainchild, I thought it wouldn't hurt to give my take on the activity I participated in with the ALA teens during thier spring break storytelling workshop.

Dates: Wednesday, March 8th 2006

Groups Participating: ALA teens

Software: Microsoft Windows Slideshow

Hardware: 1 digital camera per 2 students, 1 laptop per 2 students, cardreader or USB cable for downloading images

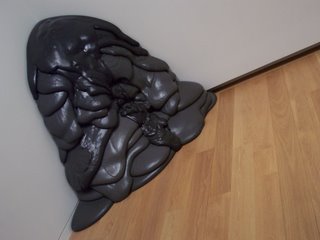
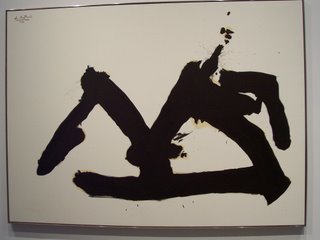
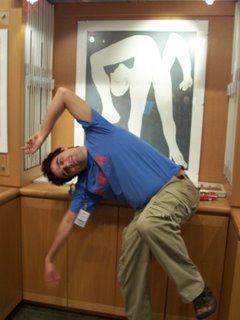
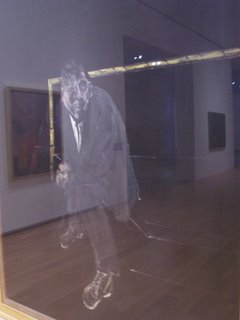
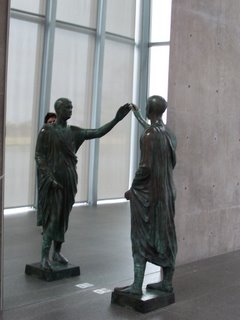
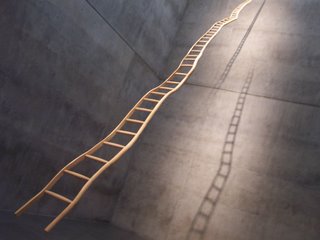
Directions: First, while on a guided tour of the entire Modern Art Museum of Fort Worth, we gathered intersting images through digital photography from artwork we found intriguing. After the tour, we spent a little more time photographing any we may have missed during the tour. We then returned to the museum, downloaded our images, and reassembled them on our laptop in an order to tell a story of your own. We then renamed them numerically, and showed them as a slideshow to the group. However, (here's the catch) we could not tell the people in the other groups what our story was about before or as we viewed it. They first had to guess its plot before we revealed it.

Associated Concepts: Prophiciency in digital photography, Encouraging creativity through storytelling in a different medium, encouraging appreciation of modern art.

Best Part: The crazy stories people came up with according to the images. The creative plots were incredibly imaginative, and the game was a blast. In fact we'll play right now...

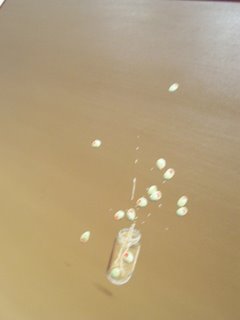
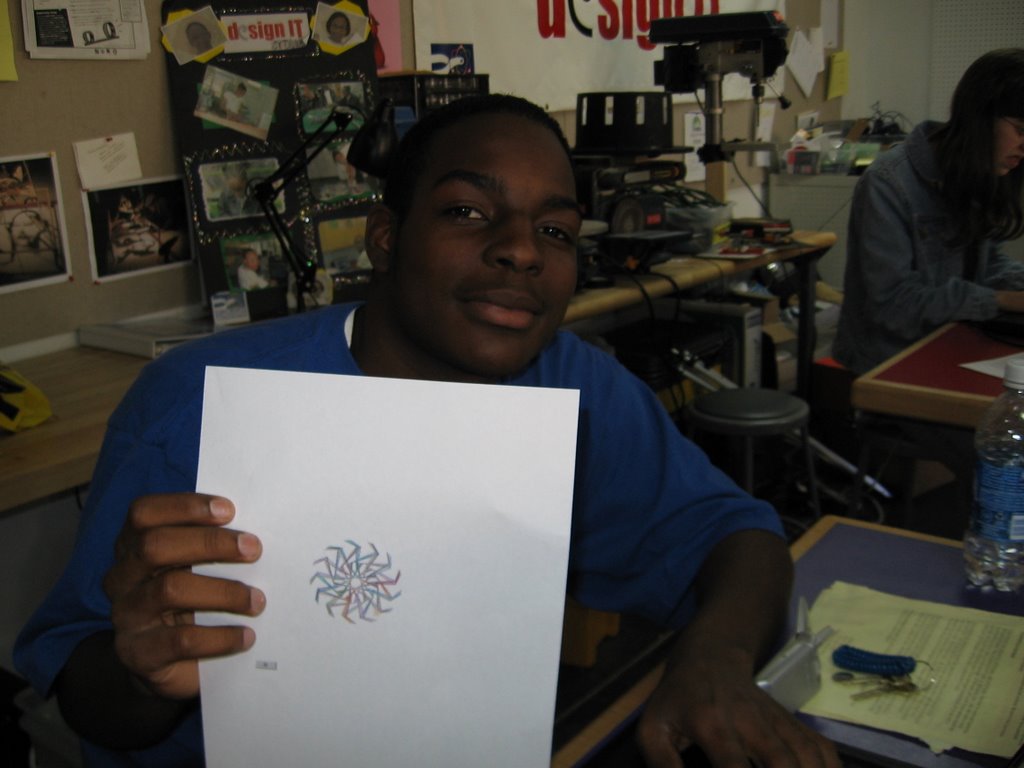
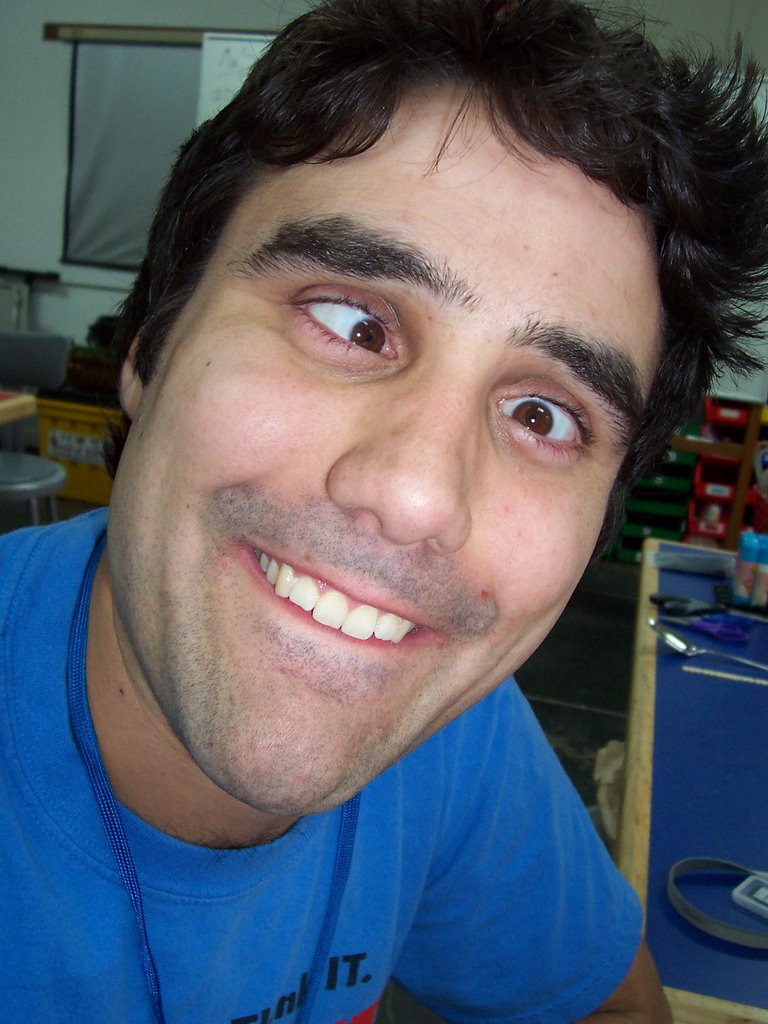
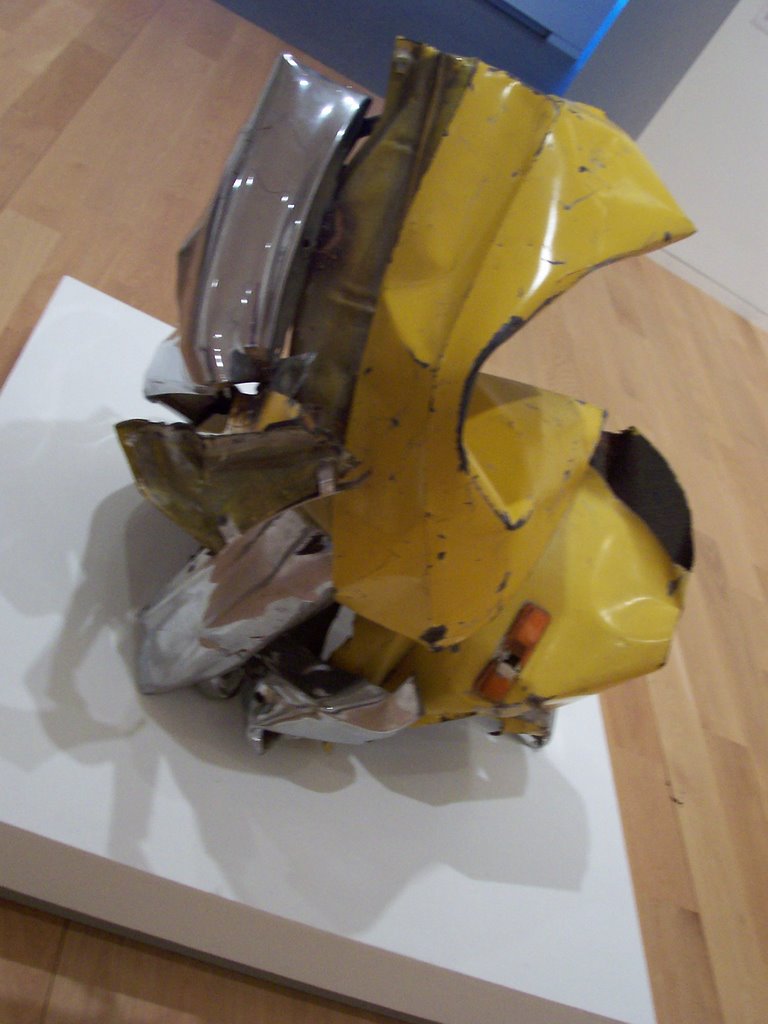
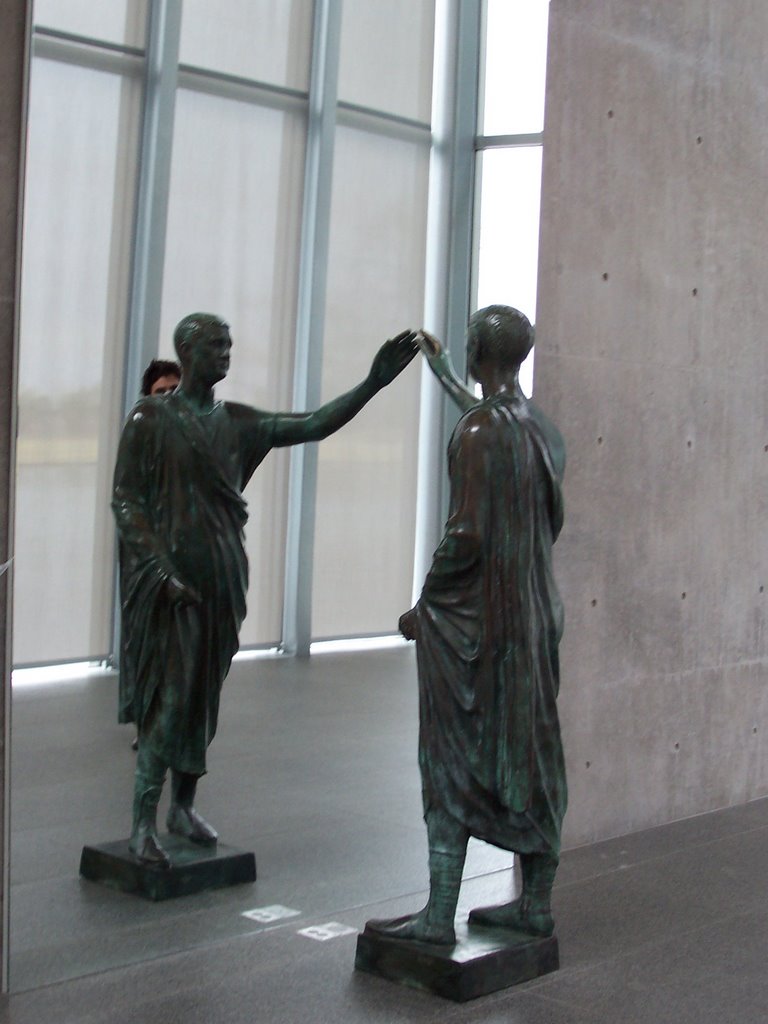
Above are the 7 images Crystal and I took. They lie in order from top to bottom. Go ahead and take a look at the images and determine thier plot according entirely to your own imagination...

...DON'T CHEAT, come up with your own plot before reading on...

Now, below is descriptions of the plot in each frame (top to bottom) that we were thinking of...

1) Drinking martinis, to the point where I drop one.

2) Drinking martinis to where I am cross-eyed and intoxicated.

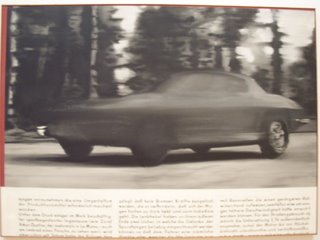
3) Getting in my car with my buddies and driving intoxicated, very fast.

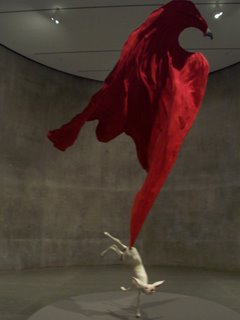
4) A chihuahua wearing a cape jumps out into the street.

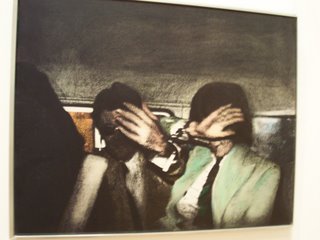
5) AAAAAAAHHHH! We cover our eyes as I swerve to avoid the chihuahua.

6) I poop my pants (The teens got a kick out of that one, especially because nobody could guess it).

7) The car gets mangled in the resulting wreck.

8) My mangled body in a hospital bed.

9) My mangled body after all the surgery possible has been attempted.

10) My mangled body in old age.

11) Upon my passing, I look long and hard at myself and ponder my decisions in life.

12) The ascent from this world.

How similar or different was our plot from your plot? Cool, huh? I had a blast with the teens during this activity. It was a great way to spend some fun, creative time with them outside the studio.

Football Anyone?


Big Idea: Why not finish off Design IT before spring break with a classic game of touch football?

Dates: Friday, March 3rd 2006

Groups Participating: ALA teens

Materials: A football

Directions: Okay, so its two even teams on opposite sides of the goal line, one defending thier enzone, one attmpting to score what's called a "touchdown" worth 6 points by...just joshin.

Associated Concepts: Teamwork, excercise and fun.

Do, Re, Mi Challenge


Big Idea: After Pico visited with Justin Pate and witnessed the mighty power that the MIDI board can hold, we had enough time to run downstairs to the studio to play with these wonderful mini-computers. Finding out they had already run through a basic introduction, and been challenged to create a basic recognizable meledy, I presented a new challenge to the group that furthered thier understanding of how the notation in this MIDI program works.

Dates: Wednesday, March 1st 2006

Groups Participating: ALA Pico group

Software: Cricket Logoblocks

Hardware: 1 laptop per 2 students, each with a transfer wire, transfer cricket, cricket, speaker wire, speaker, bus cable, and MIDI board

Directions: This activity works the best following the "Intro to MIDI" activity. Have them all pick a meledic instrument (it cannot be a sound effect), then present this challenge...Starting at the note number 48, write a program that will sound like the octive of a C major scale, that is, "Do, Re, Mi, Fa, So, La, Ti, Do". The notes must each be 5 (or .5 of a second) long. After five to ten minutes (depending on thier progress) have each group play what they have thus far to the group individually. After they have, present the concept of thinking about the numbers as the numbers of a keyboard. Draw it out and label the keys (see pic above), then have them re-configure thier numbers. After a few minutes, have everyone press play at once, and you should have a chorus of MIDI boards all singing an octive of the C major scale.

Associated Concepts: Combining programming MIDI with musical concepts.

Best Part: When all the MIDI boards sing together in harmony.

Worst Part: Not having enough working equipment to work with (see improvements).

Improvements: Due to lack of time, we could not test each computer and cricket set-up before the teens arrived, so we had alot of the infamous "no cricket in sight" issues, and therfore three teens per laptop. Be sure to prepare whenever working with MIDI by testing each set-up before the teens arrive to ensure less frustration and a full learning experience for all involved.

Tuesday, March 14, 2006

Justin Pate meets ALA


Big Idea: To finish up the sound cycle and have a fun, memorable activity going into spring break for our ALA teens, we brought in our good musician friend Justin Pate.

Dates: Wednesday, March 1st 2006

Groups Participating: ALA bluedots and pico’s (& Cale in small, lost sweatshirt - see pic above)

Materials: Be sure to check out a “rhythms the world” instrument kit from the museum library.

Directions: For Justin’s workshop, we followed the same scheduale with ALA's as Panther's, but we decided to present it upstairs in “Hands On Science” so the public could watch his and our performances as well. We first introduced Justin, and then introduced his technology by distorting each teen’s voice in his I.R. midi voice distorter. Then, after a brief performance of Bobby McFarren’s “Don’t Worry, Be Happy” to present his looping instruments, we had the teens create their own tune by looping an 8 measure sound they made individualy into a microphone from an instrument of their choice. After we all recorded our sounds, Justin added his own instruments to build it all into an awesome orchistra of sound and music.

Associated Concepts: This not only is a fun, climactic event to end their sound cycle, but by meeting an artist like Justin, it encourages them to see that there are opportunities out there to make a living in science, engineering, or at simply doing what they love.

Best Part: The songs we made as a group, our audiences reaction to the music, and the teens sense of accomplishment in taking part in composing thier song. Its been said that "musicians are magicians", and I cannot help but think of Justin Pate when hearing these words.

Worst Part: Buses ran late so some of parts of each workshop were cut short, but not to the point where the teens did not love what we did.

Improvements: More time for more fun with Justin Pate.

Special Announcement


Just thought I'd let everyone know, that as of Wednesday, March 8 2006, it was announced from the National Headquarters of the Boys and Girls Club that two projects created in the Design IT studios at the Panther Boys and Girls Club recieved national recognition and praise. Jasmine Jackson's original score entitled "Jazzy Girl", composed with the help of the software "Acid Pro" and with the help of our Design IT coach, Gabe, was awarded 1rst place in the South West Region and placed nationally in the 2006 Boys and Girls Clubs of America's "Music Making Festival". Also, with the help of Design IT, for the second year running, the Panther teens have once again won the South West Region's short film competition in the "Digital Arts Fest", with thier film entitled, "A Glimps At Our Life At Our Club", which is also advancing on to the national finals. Be proud, gang! We do great things!

Panther's 2006 Sound Sculpture Gallery Night


Panther’s 2006 Sound Sculpture Gallery Night

Big Idea: In a culminating event to show off their works, we programmed and finished the designs for our Sound Sculptures, and prepared the room for our first annual “Panther’s 2006 Sound Sculpture Galley Night”.

Dates: Wednesday, March 8th 2006

Groups Participating: Panther Teens

Attendance: Jonathon, Joshua, Thomas and all the patrons from Panther visiting our gallery
(in all, about 15 kids)

Materials: One flashlight per sculpture, paper, markers, a photocopier, pizza and soda for Design IT teens, cups, plates, napkins, snacks for visitors

Directions: We cleaned and set up a table in the middle of the teen room where we placed the sound sculptures. Next to each light sensitive sculpture we placed a flashlight. We then designed, photocopied and distributed press release cards stating the time the gallery would be open. Finally, we had each artist stationed by their piece to be ready to answer questions, and when the gallery opened, we had each artist introduce and give a brief explanation to the group. Then we let the patrons explore.

Associated Concepts: Learning how to curate a gallery and public speaking.

Best Part: I enjoyed presenting the challenge of public speaking to our teens, a skill we definitely should include and encourage with each culminating event in Design IT. Many of them, though nervous, flourished when presented with this challenge and took on the role with confidence. By publicly presenting their work, it gives them a deeper sense of accomplishment.

Worst Part: The fact that we really only had four artists with completed works, although the four were amazing. I wish teen attendance was greater at Panther. Perhaps it will increase.

Improvements: Definitely leave time to make a big deal about the “gallery night” concept with brocheres created and distributed by the teens. It simply adds to the teens’ sense of accomplishment in their final projects.

Building Sound Sculptures @ Panther


Sound Sculptures

Big Idea: We ran into some issues with getting a van to run us to the museum, but that did not hinder the creative teens at Panther as they worked towards completing their Sound Sculptures out at the club.

Dates: Monday, February 27th, Wednesday, March 1st, Monday, March 6th 2006

Groups Participating: Panther Boys and Girls Club Teens

Attendance: Jonathon, Braela, Thomas, Joshua, Michael, and Lahmia

Software: Cricket Logoblocks

Hardware: Laptops (1 per every 2 teens), laptop plugs, transfer crickets, transfer cables, crickets, motors, motor connectors, extra lego motor attachments and gears, light sensors, digital projector

Materials: please use this as a checklist...
-Miter box (saw guide)
-wood hand saw
-metal hand saw
-hot glue guns
-hot glue sticks
-lenths of peg board to use hot glue guns over
-hand drills
-drill bits
-various lengths of screws
-extra charged batteries for hand drills
-quick grips
-table vices
-various wood pieces
-various sound making materials
-soldering irons
-soldering stands
-sponges for soldering stands
-solder
-wire
-shrink wrap
-wire cutters
-scissors
-zip ties
-duct tape.

Directions: Let ‘em go. Make sure to bring in one completed sculpture for inspiration, and encourage them to begin by pointing out various objects with sound making potential, then building a stand to hold up the objects. Also have the digital projector set up to go through the logoblocks program needed as a group or individually according to the needs of the sculpture.

Associated Concepts: Tool and programming proficiency, confidence in creative process

Best Part: Definitely finishing projects successfully, however one thing I enjoyed was letting Michael go. I’ll explain. The other teens were determined to finish a working sound sculpture, however Michael simply wanted to use the tools and that’s all. We definitely encouraged him to go past the point of simply sawing and drilling, but that’s what he wanted to focus on. I thought about it and realized one concept of Design IT is our open studio policy. Michael showed up everyday, worked as long or longer on his “project” and loved being there. I simply realized that one idea of Design IT is to guide a teen to their path of interest, and from their let them takeover. Though he wasn’t completing the project we had in mind, in the end he completed a sculpture of his own that he was proud of, and had increased his tool proficiency ten fold.

Worst Part: Of course not getting the teens to the museum when I promised, and occasionally forgetting materials needed to continue on certain steps on thier sculptures. Please read “improvements” for that reason.

Improvements: You can build sound sculptures at the clubs without using power tools, but it’s simply a matter of bringing all the necessary materials. So PLEASE use the list of needed materials (the hardware and materials lists) above as a checklist and guide. Bring more crickets, transfer crickets, motors, and extra batteries then you think you'll need, and you and your teens should be successful.

Saturday, March 11, 2006

Northside Weekly Plan: March 15 - March 17

The Students
Twenty-five 7th through 11th grade kids at the Northside Boys & Girls Club.

Learning Objectives
Have a little fun in the exhibits and watch an Omni film on Wednesday. Then do a two day workshop that is a balance of directed Cricket projects, electronics take apart, and electric circuit exploration. More on this later.
Wednesday
11:30am - 5:15pm The students arrive at the Museum at 11:30 for lunch. The we go upstairs for the 1:40pm Adrenaline Rush show in the Omni Theatre. We spend the rest of the day in the exhibits Sandwiches, chips, apples, and cookies.

Thursday

Cricket Workshop
: 1:00pm - 5:00pm The teens will work through several cricket based activities. The first will be a directed project
Twelve laptops. Fifteen Cricket set-ups with extra batteries (9V and AAA). Twelve MIDI set-ups (MIDI board, bus cables(2), speaker, speaker cable, headphones). Snacks. Keyboard. MIDI handouts. m

Friday

Cricket Workshop: 5:00pm - 7:00pm
Part 2...I will explain this in more detail tomorrow.

Friday, March 10, 2006

Museum School Digital Spirograph Workshop Plan

Big Idea
Introduce a group of students to the Spirograph toy, then show them how to create Spirograph images with MicroWorlds by programming in Logo

Time
Saturday, March 4th. March 11th. 10:00am - 12:00am
Groups Participating

Museum school students, Saafir, David (ALA), and Eddie (ALA)

Plan
Introduction (Fifteen minutes)
Have the students "interview" each other and report out to the group. Make sure I learn the students' names before they come. Talk about how simple rules repeated many times can lead to complexity. Show the example of "Life."
Materials: Nametags, a few examples of "Life" games, projector, website handouts

Real Spirographs (Twenty minutes )

  • Give the students a chance to create Spirograph drawings on paper
  • Show them how to mount their drawings on a construction paper backing
Materials: Spirograph toy sets, a variety of colorful ball point pens,

Introduction to Programming (Ten minutes)
Do the "Saafir-o-bot" demonstration, in which I turn into a programmable robot that understands only basic commands and the students' job is to get me to make a peanut butter and jelly sandwich. A gigantic (and hilarious) mess ensues as I take their instructions in the most obviously literally way and "put the peanut butter on the bread" or "move your hand forward".
Materials: Peanut-butter, bread, jelly, a plastic knife, goggles, gloves, a lab coat, something to protect the tabletop,


Microworlds Intro (Thirty minutes)
Introduce Microworlds, turtles, and basic Logo commands. Give them the challenge of writing a procedure that draws a square and a circle. Show them basic spirograph programs.
Materials: Laptops with Microworlds already open and several sample spirograph programs saved, spirograph handout


Digital Spirographs (Thirty minutes)
Show them some additional commands (setc, random, sliders, etc.) Begin creating interesting Spirograph patterns. Print out the students' patterns to take home. Wrap up with a discussion of the morning and a share out of interesting things the student's discovered while exploring Spirograph patterns

Spring Break Workshop part 1

Big Idea: Using nonverbal communication towards telling a story.

Time: Tuesday, March 7, 2006

Participants: Marcus, Eddie, Lauren, Caroline, Jade, Jared, David, Jonathon, and Sammie.

Activity: Is it possible to tell a story? Yes, of course! But is it possible to tell a story by using only nonverbal communication? Well, that was the challenge for the teens today. First, we divided to teens into pairs. Then the real task came. The teens had to use two Lego motors and a cricket to create a scene. After some discussion with their fellow partner, they all set out to work. The materials were already laid out for them to choose. After everyone was done making their characters and scene, they then had to program their characters. When all was finish, we took turns telling our own version of the story before the creators tell us the actual story.

Best Part: It was hysterical to hear the teens various stories.

Worst Part: The characters that were connected to the motors would not repeat the same outcome that the story teller wanted them too.


Eddie programmed the characters, while Jared tested the character.


Jared repairing the character.


Marcus programming the characters.


David connecting his characters onto the motor.


Caroline changing the program of the motor and Jade repairing the fallen character.


Lauren putting the finishing touches on the lego board.

Thursday, March 09, 2006

Panther @ Museum


Big Idea: We finally got the Panther teens to the museum to get them through a Power Tool Safety and Proficiency Test and get them started on building their Sound Sculptures.

Dates: Wednesday, February 22nd.

Groups Participating: Panther Teens

Attendance: Joshua, Jonathon and Michael

Software: None

Hardware: None

Materials: Miter box (saw guide), wood hand saw, metal hand saw, hot glue guns, hot glue sticks, lenths of peg board to hot glue over, hand drills, drill bits, various lengths of screws, extra charged batteries for hand drills, quick grips, table vices, power scroll saw, power drill, power sander, various wood poeces and sound materials.

Directions: To get them comfortable with thier working envirnment to build sound sculptures, I first gave them a tour of where to find things and I encouraged cleanliness by showing them where the trash cans were. As we toured we went from station to station and reviewed safety issues for each activity (ie. create a "safety circle" when working with any tools, glue guns are hot, use a vice grip when sawing, use table vices and first create a guide hole when drilling, etc.) Then we went to the power tools and did a detailed review of how to use them safely and proproperly...

1) Use safety googles
2) Check safety circle for people
3) Show the teens an example of safely using the tool first
4) Have each one of them safely use the tool in front of you
5) Make sure they know to use pieces of guide wood when cuts are made 3 inches from the blade/drill/sander or less.

After each teen passed our Power Tools Safety and Proficiency Test, we headed over to the supply table, where we first viewed an example of a sound sculpture. Then we had the teens spend some time exploring sounds some of the materials could make, and discussed how that sound could be incorporated with the motion of the cricket motor into a sculpture. Finally, we started building.

Associated Concepts: Confidence in using power tools Safely and creatively.

Best Part: At the end of the day, we alread had 3 sturdy stands built ready for addition of crickets.

Worst Part: Too short of a time period.

Improvements: Get the teens there right at 5:15pm