Friday, December 30, 2005

ALA showcase Day Dec 21

The schedule posted below was followed as closely as possible, with both groups from the ALA - the PICO and the BLUEDOT - getting time to showcase their work.

I would like to say at the beginning that i believe i was too ambitious with my thinking here, because i didn't comepletely think through how we would get visitors down into the studio for the BLUEDOT showcase. The visitors to their work turned out to be mostly their parents and some of the PICO students and parents. This is good that they had people to share with, but i would have liked for them to have more interaction with museum visitors. I will rethink this idea and rethink my spaces for the next time.

The BLUEDOT group worked hard for the enire morning and most of them are not finished with their fluency projects. Most of the students are working very hard to complete an independent work that they are passionate about, and some are even using this opportunity to create something that not only incorporates IT skill, but works for a school project as well. This is the case with Wesley's solar car. Caroline is working hard on her film, using new music clips as well as a great story and set design. PJ is working hard on his Microworlds game and Eddie, Leland, and Matthew are all experimenting with IR technology from the crickets. This group has done remarkably well and i can't wait to see all the finished work from this independent creative time.

The PICO group came in and worked so hard - i was so impressed!! we had a couple of the kids who could not make it to the showcase day (this was a week later than originally planned due to a snow day, so some of the kids were already gone for the school break) so i ended up combining a couple of groups. Group 7 - william went to work with tyler from Group 4 because none of their members could make it. The chain created by the groups was so incredibly elaborate - pictures will be coming soon! The News media here picked up on what we were doing and we made the 6pm news here on the NBC affiliate!! These students showed some amazing proficiency with the crickets and their programming, such as creating switches that run uphill and sensors that read when darkness falls to set off domino runs and marbles - these young people were astounding!!!

Special thanks to Gabe, Crystal, Sammie, Myles, and Saafir for all their help and hard work! These young people from the ALA have amazing facilitators and each of them has been a great help to me over the past semester. I appreciate all the hard work and i know some of them also work out at the clubs too. Thanks for helping make the cricket and its usage a reality for these kids, as well as lending your creativity to theirs no matter the project!

Jonathon

Wednesday, December 28, 2005

Microworlds Virtual Animations - Short Stories


If I could do it all over again, not only would I have done a Microwrolds Short Story on my own and learned more about how to do it, but we would of planned this as second next step of three in the lesson plan, with a period all to itself. We tried to cram this AND creating a game into one session, and it was too much. Luckily, Gabe was there to save the day, and a few teens including Lianthia and Braela worked hard on this concept and created some great pieces.

Microworlds Virtual Animations - Short Stories

Big Idea: Create a short story with characters, dialogue and plot development through Microworlds

Dates: Wednesday, November 30th

Groups Participating: Panther Boys and Girls Club DesignIT teens

Attendance: 5 students - Joshua, Eddie, Michael, Leanthis and Braela

Software: Microworlds

Hardware: One laptop and one mouse per student

Materials: photocopies of storyboards, pencils

Directions: This is a great next step from virtual flipbooks, because it involves page duplication and character animation which were taught last time, however it also introduces a few new concepts, including how to add text to the page for dialogue, how to create and add music for mood, and how to add thier own voices through a microphone to thier story. Finally, it also introduces a very important concept, how to create and use simple buttons, that is, buttons that turn pages or start animations. As far as specific directions on how to do all of these, it would take quite some time to write out. Definatley view and explore examples, and spend time to create your own before teaching this activity. Before they begin, show them an example on the digital projector, mabye brainstorm and assign subject matter (as suggested in the improvements category in the "virtual flipbook-11/28/2005" blog), and hand out storyboard sheets for them to brainstorm with before they begin.

Associated Concepts: Storytelling techniques and computer programming

Best Part: Lianthia's "chase" turned out to be an awesome example of a Microworlds short story, to the point where I had no idea how she created it in one hour. I thought she had help from Gabe until I found out she worked on it by herself the entire period.

Worst Part: Getting guys interested in this. Definately do not present the gaming option before or alongside this one, because this will get tossed aside. Definatley create a uni-sex example to show, perhaps something with humor, then mabye assign a subject matter that will interest them, like...
-thier best moment in sports
-the scariest moment in their lives
-most violent scene in a scary movie

Improvements: I definately did not present this one right. Show an example, spend a period on this challenge, show how to build a button to turn pages, and make it fun/funny for both guys and girls.

Next up, the gaming lesson, the two week Microworlds Animation Challenge, then our culminating event, the 2005 Panther Holiday Animation Festival, which, to get you excited, went over beautifully. More to come!

myles

Microworlds Virtual Animations - Virtual Flipbooks


The holidays have come and gone, and I do hope you all had a blast with the food and the family and the who-ha, but I gotta catch up on what happened over at Panther between Thanksgiving and the Holiday Break. During this time, I learned alot. I found I was reletively unprepared and uneducated about Microworlds, which would have hindered the learning process of the kids if not for Gabe's help and pacing the lesson plans. By seperating the activities into smaller lesson plans with goals to be reached by the end of the period, goals that taught only one or two steps at a time, the program did not seem as intmitating to most. Because of this, I believe we had a successful few weeks with this software. However, you have been forewarned, a well thought out lesson plan should be prepared when teaching Microworlds, and hopefully through the next few blogs DesignIT can learn frommy mistakes, and the many improvements and adjustments I will suggest.

Microworlds Virtual Animations - Virtual Flipbooks

Big Idea: Encourage confidence in computer programming and provide a new creative medium through the exploration of Microworlds.

Dates: Monday, November 28th

Groups Participating: Panther Boys and GirlsClub DesignIT Students

Attendance: 5 Students - Michael, Leanthia, Marcus, Jonathon, and Eddie

Software: Microworlds

Hardware: One laptop and and one mouse per student

Directions: *NOTE* Arrive early. I found the best way to get as many students interested as possible was to arrive before they did, set up the laptops, turn them on and open the program, and if I had something to show them over the digital projector first, I closed the laptops until I was through. Because I had just taught how to build actual physical flipbooks, it seemed a natural transition into Microworlds to teach them how to create thier own virtual one. This worked very well and interest seemed high right off the bat. Also, each lesson plan consisted of one or two simple concepts, and the next built off of the lastand added one or two more. This being the first lesson, its main concept was clicking, dragging and pasting scenery to create a page, duplicating that page, then clicking, dragging, and pasting a character in a differant spot on each page to create the illuson of motion. This familarized them with the pages icon which is used commonly for the various projects. Here's a quick rundown of how exactly to create a flipbook in steps...

-have the teens pick a character they would like to animate first. have them tell you outloud for group participation, bu t express they should not yet drag it onto the screen

- have them then pick a backround where thier character will be

-click the and drag the choosen backround onto the page

-re-size it to fit

-using the stamp icon, stamp it down - let them know once something is stamped it cannot be erased

-duplicate the page as many times as you need

-return to the choosen character and click and drag it onto page 2 to its starting position (page 1 should remain blank if character will enter onto screen itself). once it is positioned, stamp the character

-for each page, move the character little by little

-under "procedures" (to the right of the screen) teach them to right a command and its program so the computer will understand how to complete the command. For example...to fly (space) page1, wait 2, page2, wait 2, page3, wait 2, page4, wait 2, page5, wait 2,page6 (space) end.

-type in the command directly under the picture and press enter.

Associated Concepts: By having just done a physical flipbook, the concepts are there on how to create a virtual one. All they need is to be taught the tools. This is an easy begining to Microworlds that will start them off confidently in what may be for many, thier first time using the software, or even computer programming. And hopefully not their last.

Best Part: Upon completion of the flipbook and typing in thier command, many of them dragged friends over to show off what they had done.

Worst Part: After completing thier first one, keeping them interested in trying another was difficult (see improvements).

Improvements:
At the begining of the lesson, it may be fun and attract thier attention to watch one or two 1 minute or less animated shorts on the digital projector, preferablycomputer animated ones, to show professional examples.
Also, an improvement I wrote about when blogging about the physical flipbooks can apply here as well. Create challenges that involve subject matter. This way they're not simply creating to create, which is great, but usually doesn't keep teens inspired. Before you begin, as a group brainstorm different short scenes they could create, such as...
-proudest moment
-worst injury
-favorite place to travel/vacation
-if they could be an animal, which would they be and where would they live
-favorite spot to hang out
Then either assign these individually after thy've finished thier first one (where they picked thier characters at random), or do one of them as a group challenge, and watch them at the end of the period and see the differant interpretations to the one subject.
Finally, definately display any work done at the begining of the following lesson.

That may be all I have time for today, but they'll be more about what to do and not to do when planning the next Microworlds cycle.

Much luv, myles

Tuesday, December 20, 2005

Gameplan for ALA Wednesday Showcase

ALA Showcase Day!!!!

9:30am-10:00am - PICO in studio
- Bluedot in Classroom 2

11:00am-11:30am - Working Lunch

11:30am - PICO’s move upstairs in Explore Zone
- Bluedots moves to Studio

11:30am-2:30pm Bluedots – setup in studio
- work on their display model
PICO – setup giant Chain Reaction
-finish work upstairs in Explore Zone
-trial run, etc.

12:30pm - Bluedot show work

1:00pm - PICO show work
- Bluedot will clean up their stuff

1:30pm - PICO done with chain reaction – move sculpture to Room 2

1:00pm-2:00pm - Sammie will pick up food
- Crystal and Bluedot will set up for party (Sammie will come
help, ASAP)

2:00pm-3:00pm - PARTY!!!


Team 1 – Ashley & Cooper
Team 2 – Stephanie, Joe, & Hannah
Team 3 – Truett, Chris, & Daniel
Team 4 – Tyler, Jacob, & AJ
Team 5 – Jade & Jared
Team 6 – John W., Tanner, & Nito
Team 7 – Stedson & William
Team 8 – Mackenzie, Allie, and Jazmin
Team 9 – Rebecca, Madison, & Austin


Monday, December 19, 2005

Friday Meeting


Hey gang. Wanted to post my feedback on what I thought to be a very progressive meeting with the crew on Friday morning. Here's how it went...

Big Idea: To meet with the heads of each club and Carlos to discuss the planning of January's cycle: Music, Midi and Madness

Date: Friday, December 16, 11am to 12pm

Dates of Next Cycle: January 9 through March 1o

Attendance: Carlos, Sammie, Jonathan, Saafir and myself

Materials: Pens, calenders, dry erase board and markers, our brains

Associated Concepts: The meeting helped us to establish concepts needed to be covered and in what order, therefore leading us to organizing a well established lesson plan BEFORE the Music, Midi and madness cycle begins in January. A few things I took note of...

- For Panther, we will start with building sound sculptures for 2 weeks, then move into midi for two weeks. Its almost like we'll be seperating the idea of creating music through IT into 2 concepts; rhythm and meledy. I'd like to keep the two reletively seperate in order to keep them focused on one concept.

- For sound sculptures, the periods will contain smaller goals to achieve by the end of each period instead of simply giving a 2 week goal. For example, to teach tool skills, it may be best to spend one period on a challenge of building a structure that holds a certain wieght by the end of the period. Then the next period, create various gears and motion machines out of woodworking. Then the next class would be to find a sound that most interests you, then using the motion machines and crickets and motors, try to create a rhythm with it, not just sound. Then finally construct all of this onto the stands built to create a sound sculpture. I think with this after school crew, they work best with focused goals which can be accomplished in a single period.

- I'd like them to work in pairs to keep them focused on each goal.

- For midi, the same concepts applies, where we'll need to establish short term challenges. Such as exploring a differant handout per period. One being the instrument handout where they should find thier favorite. Next the notation handout where it shows them what numbers coorilate with which pitches. Follow this with assigning each student to find the pitches for a simple tune. Finally, have them bring in a song, and pick which instument would sound best to mimic it, then try to copy it through midi. Another idea for a final challenge would be to have them work in groups of four or five and create a five piece midi band with five seperate instuments playing the same tune. All of these ideas brought up the discussion of meeting the needs of those who lack skills verses those who need more intense challenges (See the photo of Saafir's graph). The lesson plans shall be carefully wieghed before proceeding to stay on the axis and keep all those who participate interested and having fun.

- We also found there are ample opportunities for guests, and it needs to be decided soon when they should visit during the cycle. Some include Justin Pate, a local musician who uses digital looping techniques in his music to create entire songs with only himself. Another includes Eddie, the head of Mondo drummers at 5th street arts. And Augie, who could bring in some of his instrument inventions. And finally another idea would be to have the kids watch the film "Pulse" which explores the rhythms and music of cultures around the world.

Best Part: When Saafir caught us off guard with some fantastic adjectives.

Worst Part: Getting our thoughts to be on the same page-but it did eventually happen.

Overall, we've got a good start for ideas on the next cycle, but I want everyone to remember this was all talkin the talk. In the next two weeks BEFORE January 9th, we gotta walk the walk through prepartion. In fact I would like to make it a personal goal for myself to have a lesson plan entirly laid out with guests already schedualed by Friday, January 6th. Rock!

Myles

Thursday, December 15, 2005

Panther Zoetropes


On the last day of physical animation before we dived into the virtual realm, we explored zoetropes. Lots of "cool!"'s and "WOW!"'s with this activity, so enjoy.

Zoetropes

Big Idea: Being the third in the 3 part lesson plan which explores the concepts of animation, this activity portrays another way animation can trick the mind into believing it percieves motion. It also gives the teens a unique opportunity to create a cartoon themselves, so at the end of the day their accomplishment is tangible and entertaining.

Dates: Monday, November 21st

Groups Participating: Panther Boys and Girls Club DesignIT Teens

Attendance: Gabe, myself, and 5 teens

Software: None

Hardware: None

Materials:

For Zoetrope: a paper or cardboard cylander, painted black, that is roughly the size of a popcorn bucket (about 9 inches tall and has at least an 9 inch diameter, both ends having the same diameter), an exacto-knife, an easily spinable turntable, a desklamp with at least a 60 watt bulb, hot glue gun and hot glue
For Activity: twenty or so strips of paper (at least 2 per student) that are 3 inches tall and their length should equal the circumference of the inside of the cylander, various colors of regular, thick-tipped sharpies, pencils, clear one-sided tape,

Directions:

To biuld a Zoetrope: (See photo) Paint the cylander black. At what will be the top of the cylander, about an inch from the edge, cut 3 inch slits into the side, lenthwise, that are about half an inch wide. Space the slits 3 inches apart for eachother. Depending on the cicumference of the cylander will depend on how many slits to cut. For a popcorn size bucket, it should be about nine. There should be about four inches to spare at the bottom of your cylander. Hot glue the cyclander to the center of the easily rotatable turntable. Place lamp facing into the cylander.
To run a Zoetrope: Take a strip of the paper. With a nearly invisable line from a pencil divide the strip into as many evenly spaced sections as holes in your cylander. Let's say there are 9 slits, than make 8 evenly-spaced lines. In each space draw a character for your cartoon that starts in one position in the first square, moves, then returns to the same position in the last square. What works best for this activity is drawing a character that rises and falls once, so long as it starts and ends in the same place. To get the teens motivated, simply ask them to name some things that rise and fall. Some of thier cartoons included a horse on a merry-go-round, a basketball going up and down once, a flag on a flagpole, a plane rising and falling, a skateboarder jumping once, ect. When finished, tape the strip of paper inside at the bottom of the cylander so as to not block any slits at the top. Have the drawings facing inwards towards eachother, so that when peering through one slit from the opposite side, only one image can be seen. Finally turn the lamp on, step back and spin. When peering through the rotating slits, your cartton will appear.

Associated Concepts: Not only are they gaining knowledge about another way animation can trick the eye, but the cartoon is so simply made but so convincing, they can walk away proud of thier creation.

Best Part: Definatley the moment of the spin under the light. After all the preparation and build up, the final product is quite gradifying for all. I loved when after completing one, they would jump right into drawing another.

Worst Part: Discovering when a cartoon didn't work got frustrating for some, but ultimately taught them what needed to be done to fix it. For instance Lianthia animated a ball bouncing, however, she first drew it so it bounced up then down in every frame, which when animated, its too fast for the mind to percieve anything. So she discovered she needed to raise it up then down once gradually to animate it successfully.

Improvements:
We were using actual popcorn buckets, which, because the diameter of the top was more than the the diameter of the bottom, made it difficult to tape our animations to the inside without tearing them. So next time we definately need to find cylanders with even diameters on both ends. Also, when writting this, I discovered there is alot of geometric terminology involved in its desciption, and math involved in its contructing. These concepts should definately be addressed when teaching this activity.

Next we're onto virtual animation in Microworlds which I will be blogging tommorrow. Hope all is well with all.

Myles

Friday, December 09, 2005

Panther Flipbooks


Large Flipbooks

Big Idea: Continue to build confidence and understanding in the concepts of animation to lead them into microworlds programming

Dates: Wednesday, November 16th

Groups Participating: Panther teens

Attendance: Gabe, myself and 5 or 6 different teens coming in and out, including some highschoolers.

Software: None

Hardware: None

Materials: lots of index cards (40 per student), clothspins, and fine point sharpies (black ones and all colors if possible)

Directions: Each student gets 40 cards or more, two clothspins, and choice of markers. By drawing a simple character or shape at the bottom end of each notecard, but changing its position or shape slightly on each, the character becomes animated when put in order, clothespinned on the opposite end, and quickly flipped from one to the next. With the one set of cards, four different stories can be created by using the backside of the cards.

Associated Concepts: A further more complicated in creating animation. It definately displays patience as a key trait for any animator.

Best Part: By making my flipbook about a little circle getting killed in various gory ways, I captured a few high-schoolers' interest. Also, Marcus pulled off a great basketball flipbook, and Lianthia's story about a a girl's ball bouncing in the road and the girl following into traffic ended tragically, but as far as animation skills, brilliantly. Although some of the highschoolers didn't participate, they expressed interest enough to where I simply gave them cards and clothspins to take home to do. Though I'll never know, I'm pretty sure they took it seriously and probably gave it a shot.

Worst Part: When the teens lose patience with activities that do not have immediate outcomes and lose interest. The after school venue is a tough place to sell activities that take time and effort.

Improvements: Again, theme based challenges would be an added incentive for creation. Such as, "Create a flipbook that shows your...
-worst injury
-best family vacation
-favorite hobby
-proudest moment
-favorite sports team/player
-favorite holiday
-favorite natural catastrophe
-favorite movie scene

The idea of animation progressed with this activity, in a fun, casual manner. Next blog I'll get into our evening with our Zoetropes, and then move into the world of microworlds.

Myles

Panther Thaumatropes / 2 Page Flipbooks


Hey gang. Hope everyone survived the arctic front and fared the cold weather. Now back to business of blogging. We started our animation cycle out at Panther a couple weeks ago, which has met some successes and some challenges. Here's the layout of our first activity of several...

Thaumatropes / 2 Page Flipbooks

Big Idea: As an introduction animation, we wanted to start basic to encourage the teens so they felt an instant confidencein the field. These first two activities demonstrate how easily our eyes are fooled and therefore the basic idea of how animation works.

Dates: Monday, November 14th

Groups Participating: Panther Teens

Attendance: Gabe, myself, and about 5 or 6 stopped by and gave each activity a try.

Software: None

Hardware: None

Materials:
Thaumatropes - Straws, blank index cards, stapler and staples, tape, markers
2 Page Flipbooks - 8" wide by 1" tall wide strips of paper, stapler and staples, markers

Directions:
Thaumatropes
- Take two blank index cards, and on one side of a card draw an image. On the other card, draw an image that will overlay the first image. Be sure the images you want to overlay are at the same place on each postcard. This can be done by drawing the first image, then laying the second card over the first image and tracing based on that. For example, if a t-shirt is drawn on the first card, lay the second card ontop, then trace the image you want on the t-shirt inside of it, therefore it will be superimposed onto the shirt. Next, staple the 2 blank index cards with thier drawings facng outward together at the 4 corners. Place a straw inside the center of the two either vertically of horizontally orientated cards. Staple the top of the straw to the top inside of the cards. Then tape the bottom of the cards to the straws to stabalize the straw to the cards - DO NOT staple the bottom of the cards to the straw for it will bend the straw and ruin the effect of the animation. Finally, hold up your thaurmatrope and roll the straw fast between your two hands. It seems superimposed animation works best with this activity as opposed to movement animation. Save movement for the flipbooks. Words are also tricky if trying to write left to right, however up and down word swork just fine. This activity is all about experimenting to see what works best.

2 Page Flipbooks - Using two long 8" wide by 1" tall slips of paper, draw an image on the first sheet. Then place the second sheet evenly over the first, and trace the image nearly exactly, however, make a minor change that will be the movement. For example a stick figure standing on two feet on the first one, and the same figure with his leg kicking in the next. Its best if your images are about an inch away from one end of the slips. Staple the slips of paper together evenly at the end furthest from your drawings. Next, using a pencil on its side, roll up the top slip of paper and your first drawing, starting away from the staple and rolling towards it, to make it curl. Finally, take your pencil and lie it flat against a table with the curled paper in between at the non-stapled end to straiten it, then scrap it toward the staple and then away in a fast back and forth motion.

Associated Concepts: Learning the basics behind animation and how our mind and eye work.

Best Part: How into one activity or the other the teens got, including how excited they got to see my "shake dat laffy taffy" thaumatrope.

Worst Part: How for some of the teens the activities held thier attntion for less than a minute. Differant strokes for differant folks I guess.

Improvements: To keep attention of the teens, perhaps create some challenges, like "Make a flipbook that shows your proudest moment" or "Make a flipbook that shows your most serious injury". This can be applied to the next activities as well.

Friday, December 02, 2005

Blue Dot Nasc-I.R. / I.R. chain reaction


Blue Dot Nasc-I.R. / I.R. Chain Reaction

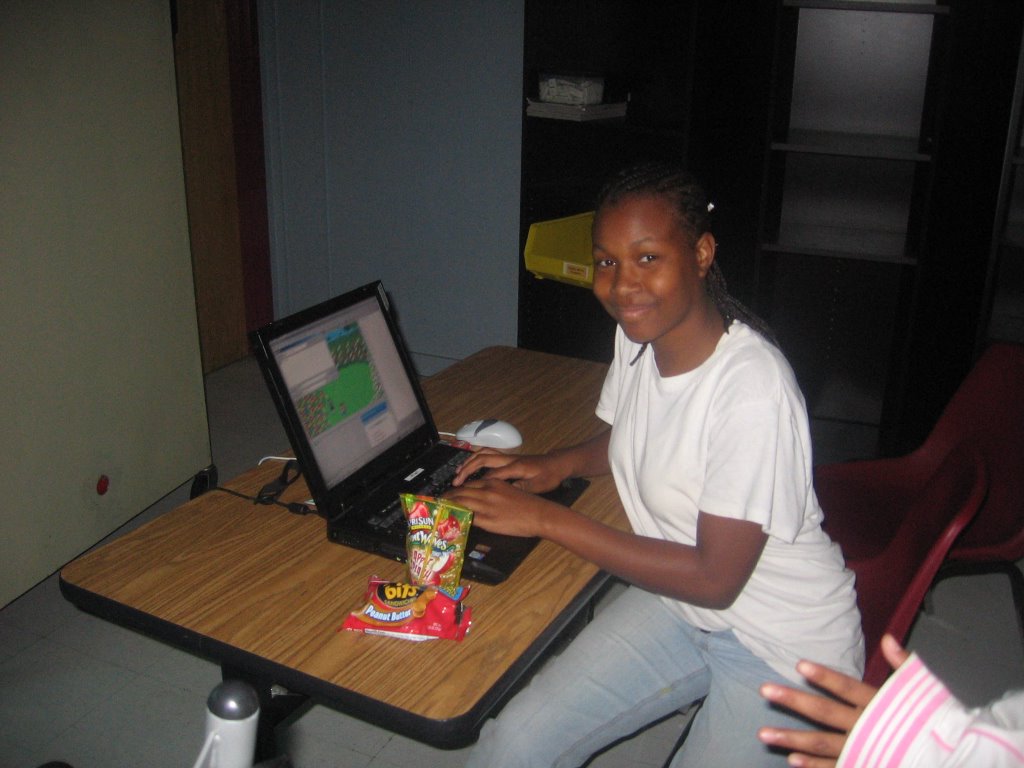
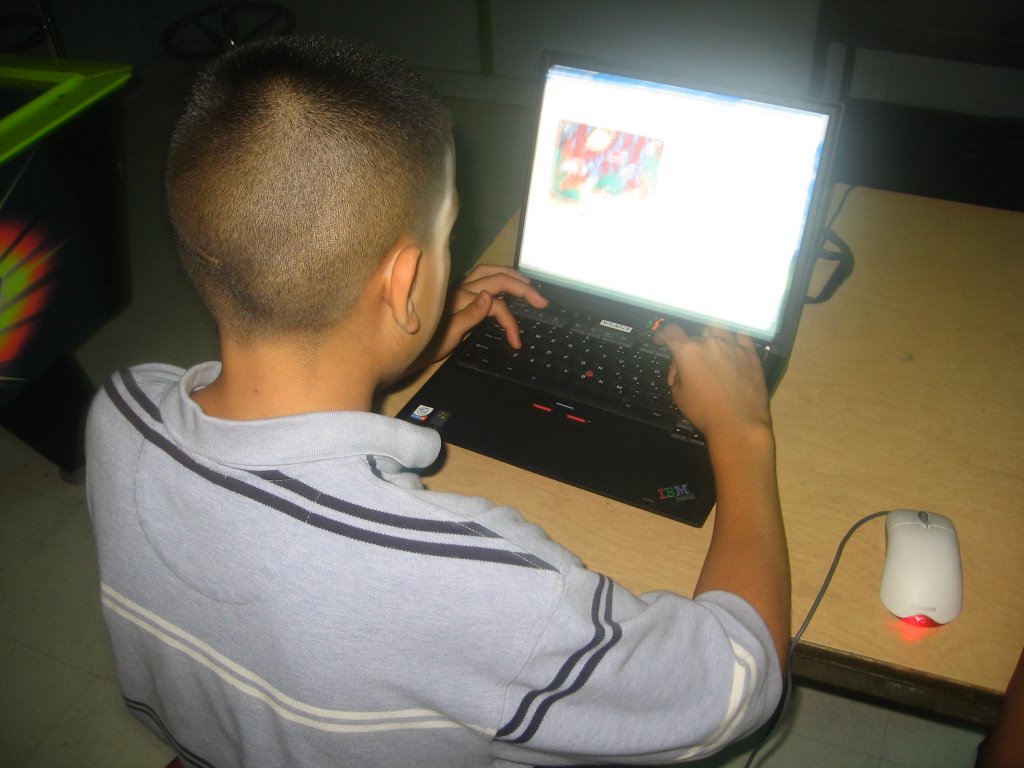
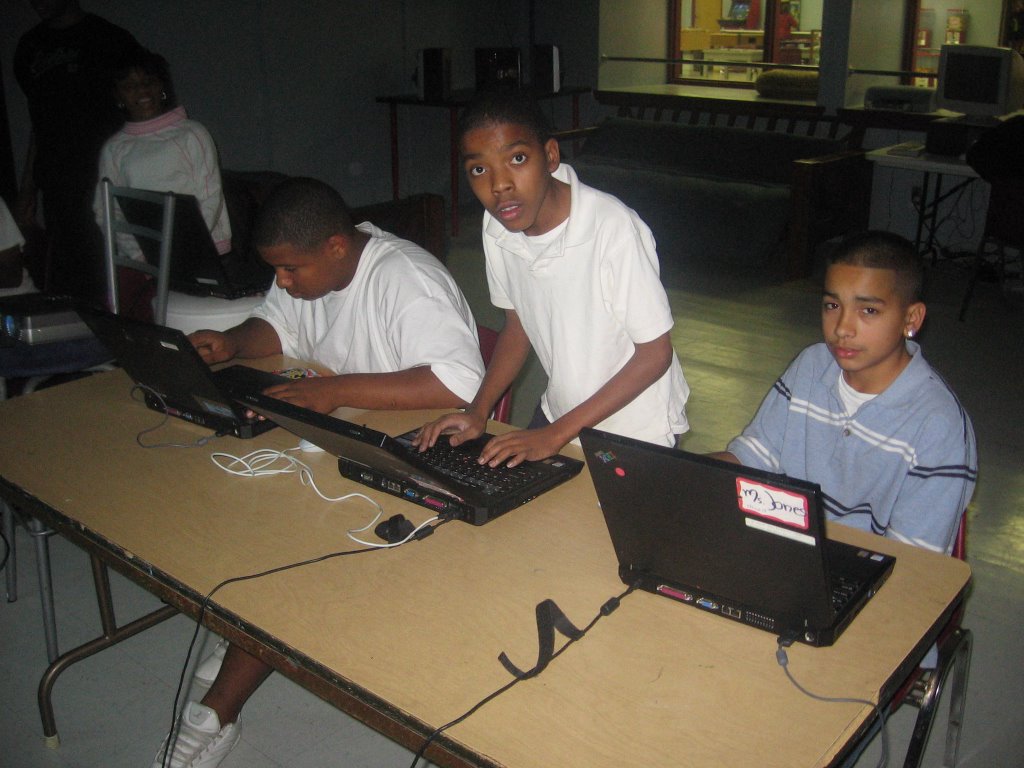
The second in a two part series lesson plan, this is the culminating event in learning I.R. We layed out 4 laptops on one side of the room, and 4 laptops on the other. 4 of the laptops had 3 crickets at each computer, and the other 4 had 2 crickets at each computer. We then seperated the group into pairs, and split the pairs to the two sides of the room. The group with the 3 crickets at thier computers worked for the period on Nasc-I.R.s, and the other group worked on an I.R. chain reaction, both of which are explained below. They worked on this project for the entire period. Idealy, the groups would switch and try the other activity the next time they met, but unfortunately we did not have another period to work with. They did however both become far more confident with I.R. through whichever activity they tried.

Big Idea: Build and race cars controlled solely from I.R. pulses and complete the longest chain reaction to date using the fewest amount of materials possible through I.R. technology. These will hone thier skills in I.R. programming through challenges which require creativity and problem solving.

Dates: Wednesday, November 16th

Groups Participating: ALA blue dot crew

Attendance: about 16 kids and Crystal, Sammie and I

Software for Nasc-I.R. and I.R. chain reaction: Logolocks

Hardware for Nasc-I.R.: laptops, transfer cables, transfer crickets, 3 crickets at each laptop, motors, motor conectors

Hardware for I.R. chain reaction: laptops, transfer cables, transfer crickets, 2 crickets at each laptop, motors, motor conectors, light sensors, switches

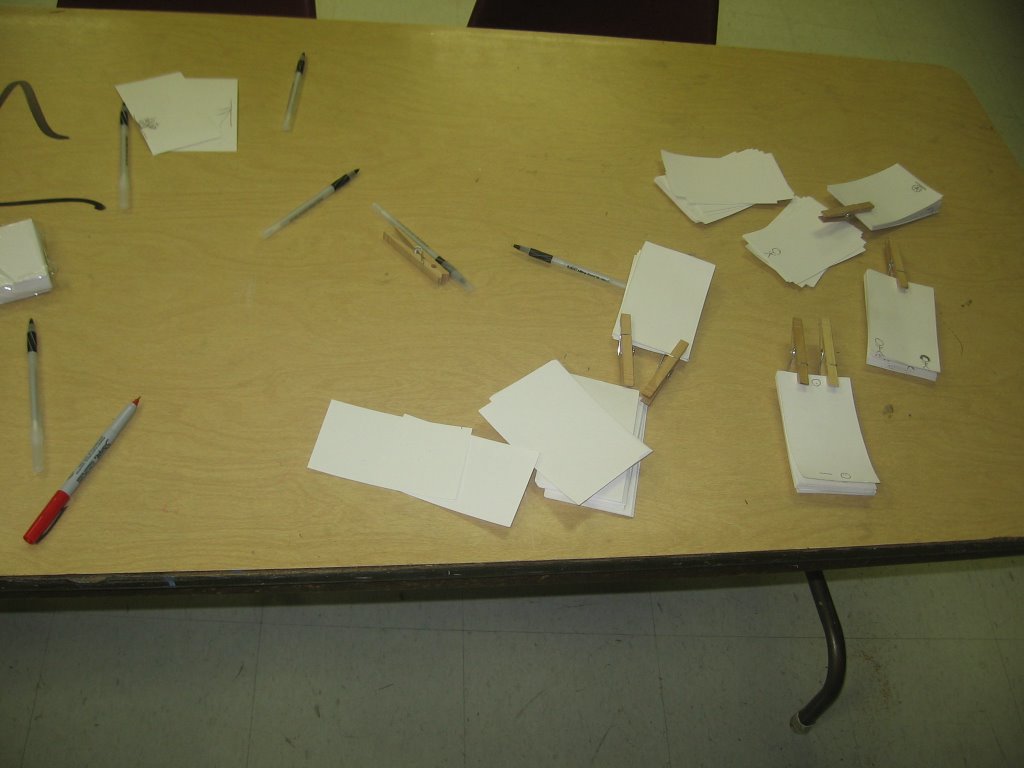
Materials for Nasc-I.R.: lego gears, lego wheels, legos

Materials for I.R. chain reaction: minimal chain reaction materials (dominos, string, cloth, tape, cups etc.)

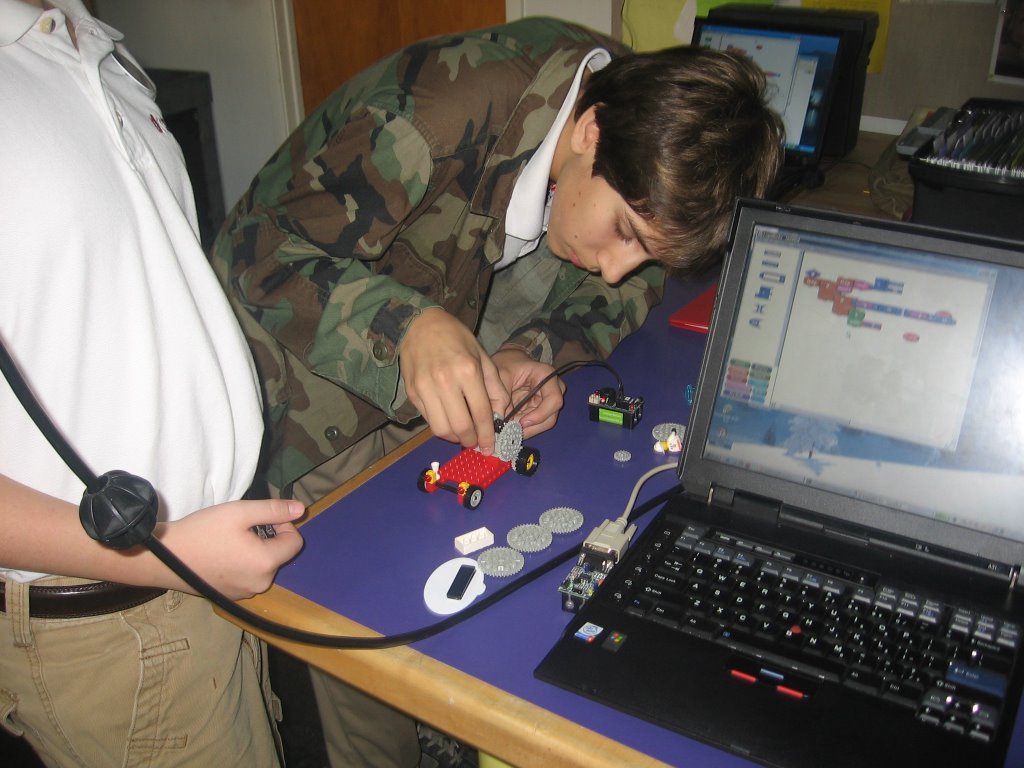
Directions for NascI.R.:
First have the kids program their crickets. Its the same program as activity two of "intro to I.R." with a few modifications. Here's a quick review with the changes, and the program should be saved in many of the laptops as "nasc-I.R." in the logoblocks program.
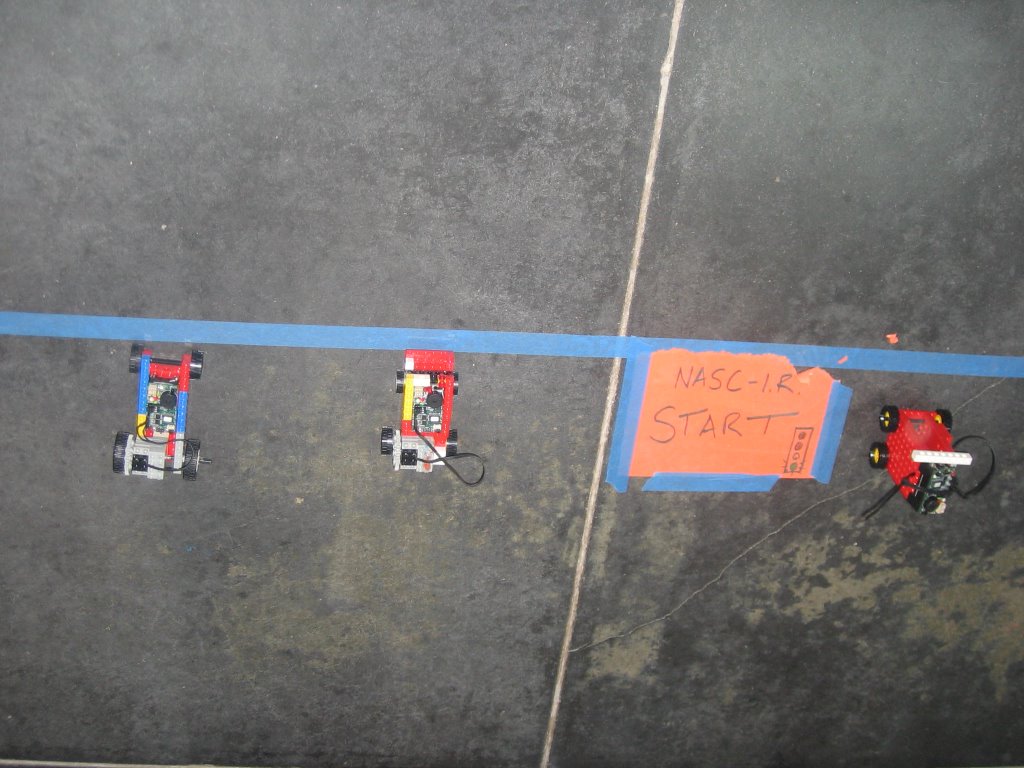
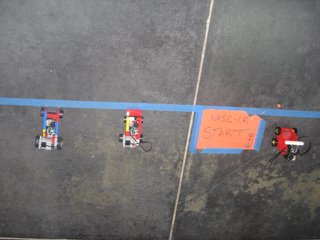
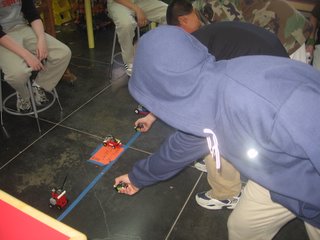
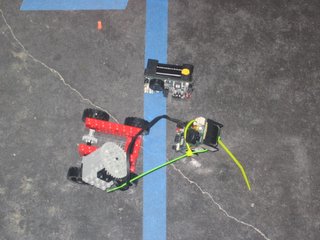
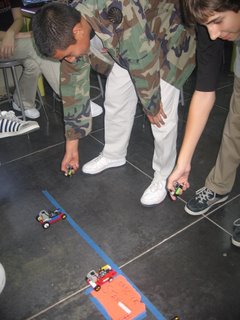
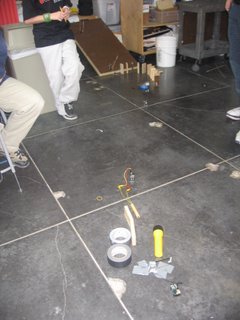
Program "remote" cricket to send a random value between 1 and 200 every second. It should read,"Loop, sendir, blue percentage block, random block (on top), 200 (on the bottom)" Next each kid should have a "reciever" cricket with a motor attached. Its program should read, "loop, if newir, another if, ir is more than 1 and ir is less than 50, motor A will run for .5 of a second" However, the numbers 1 and 50 will not be in everyone's program. You see, in order for the races to be fair and each race have a different winner, each car's reciever cricket should be programmed at different number values, therefore all cars will travel at different times. For example, car 1 will be programmed to travel only when the values of 1 to 50 are sent, and car 2 will only travel only when values 51 to 100 are sent, and so on until 200, which will provide enouph values for 4 cars to race. Since the remote cricket is sending random numbers every second, it'll be random who wins the race. Next the fun part for most- designing and building their race cars. This can be accomplished a number of ways, so let the kid's be creative. The most popular way was though a basic two-gear system where the motor spun one gear which spun another that was attached to the wheel spoke. Also, use zip ties to secure crickets onto the cars, and to secure motors that want to jump off. Finally, to race the cars, designate a starting line and finish line. Line them up, and have one teen from each car stand about 3 feet from thier car. I just thought of this, but have the teens mount thier recieving crickits on thier cars pointing out the back end so they can walk behind them as the race progresses. Clearly state, "Ready, set, Go!" and that's when they press the white button on thier remote cricket to begin the sending of I.R. signals. Make sure they remain within 3 feet from thier cars, otherwise they will stop running or continue to run non-stop, in which case that particular race is forfitted. Good Luck!

Directions for I.R. Chain reactions:
Contrasting with the Nasc-I.R. competition, in this activity the teens will first work in pairs to program thier 2 crickets and then work with the other pairs in their group to create a chain reaction with all 8 crickets. So, with each laptop having two crickets, one should be programmed as the "remote cricket" and one the "reciever cricket". However, in order for a chain reaction to occure, the 1rst cricket, the remote cricket, needs a sensor and that sensor needs to react to a change in order to send an i.r. Then, after the cricket next in line, the reciever cricket, recieves that i.r., it needs to be programmed to do something to change the sensor of the cricket next in line, another remote cricket, and so on. For example, one program could read, "loop, if sensor a is more than 10, send 1r every .5 of a second" (which is the remote cricket), than the other reads "loop, if new ir, run motor a for .5 of a second" (the reciever cricket). This motor running would then somehow effect the sensor of the next group's remote cricket, and therefore continue the chain reaction.

Skills: I.R. programming, understanding how I.R. waves are sent and work, understanding of how the crickets communicate

Associated Concepts: confidence in programming, working in pairs premotes cooperation, creative design, problem solving

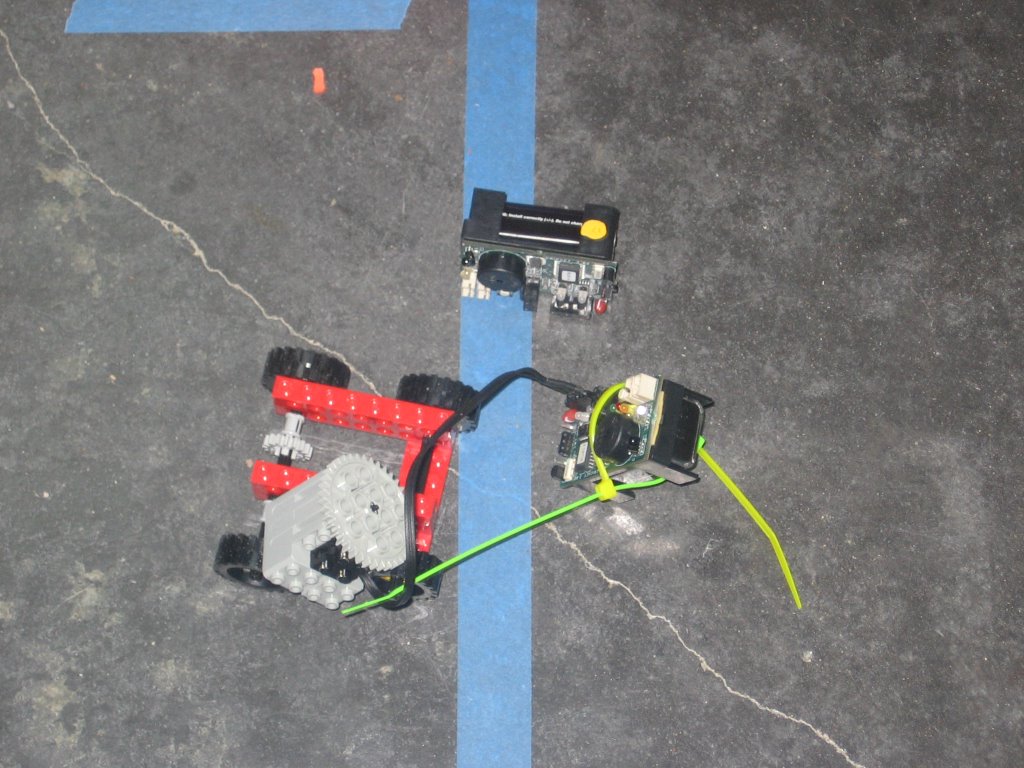
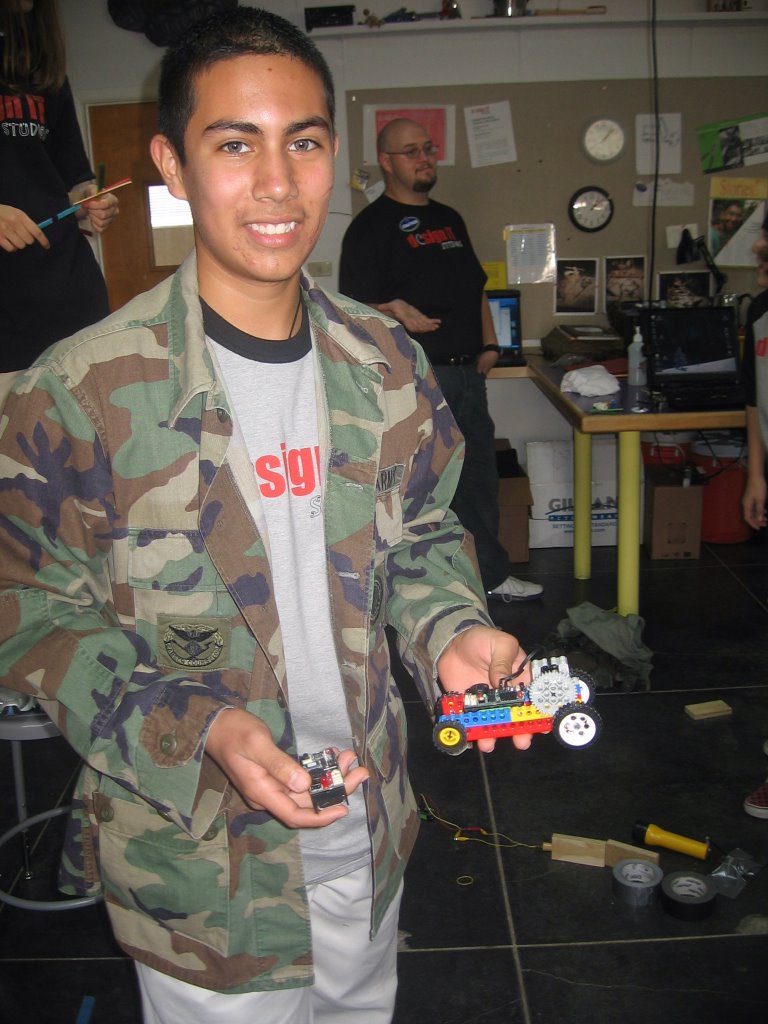
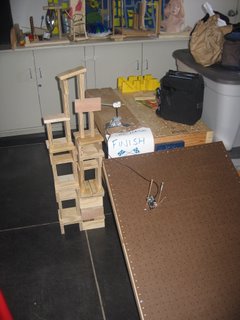
Best Part: As far as for Nasc-I.R., the races were fun, however, one dicovery was exceptional. They figured out that because it was random when I.R. was recieved to run thier motors, that the physics of the car mattered the most. They experimented with wheel size and placement, car size and more. Eddie's car won by the way, not hat anyone is countin. As far as the chain reaction, at the end of the day they set the record for building the longest chain reaction with the least amount of materials in DesignIT history.

Worst Part: When Joey's car fell apart at the line. He made 3 emergency pit stop attempts but was unsuccessful. Luckily, he handled the defeat well, and blamed it on his experimental "the taller the better" design.

Improvements: I would have loved to had another period to switch the groups so both could try each activity, so make sure to scheduale time for a switch. Also, in the Nasc-I.R. races, I like my recent idea of mounting the crickets on the back of the cars pointing towards the back so the controllers can run behind them instead of in front. And finally, it may be better to program swiches onto the remote crickets for Nasc-I.R. to begin the sending of I.R. therefore making them seem more like remote controls-up to you.

I'm havin a blast coming on Wednesdays and keeping up with the older ALA kids, who Amanda Morales and I were teaching at ALA almost 2 and 1/2 years ago. I've also established some positive which newer teens like Eddie and Lauren and others. I'm thrilled to be able to work with both ALA and Panther. Next up, we're goin back to Panther to blog about our successful animation cycle thus far.

Myles

Thursday, December 01, 2005

Blue Dot Intro to I.R.

Hey gang. With all this blogging about Panther, its hard to believe I've been having a blast with Jonathon, Sammie, and Crystal at the museum with the ALA crew every Wednesday as well. With the success I had over at Panther last school year with I.R. activities, we thought it was about time to introduce I.R. to ALA. So I reviewed my blog entry from Friday, June 3rd 2005 about the intro class, and planned out a lesson plan based on that. This was the first time I used our blog as reference and my did it pay off! In fact I virtually followed the same plan, so reference both this and the other if you like. Here's how it went...

First we handed out a quick questionaire asking thier knowledge on the concepts of waves. It had many of the same questions as last year, and a few new ones. Here's some examples of the Q and A...

Q: How do you think crickets, the insects, talk to one another?
A: Using chirps in sound waves
A: They rub their legs together
A: Through I.R.

Q: How do you think our crickets, the machines, talk to one another?
A: Through I.R.
A: With the lights
A: Through computer technology

Q: What is a wave?
A: Something that comes into the beach
A.The motion of the communication
A. A sound traveling in a curvey way
A: (drawing of a squiggly line)

Q: Name 5 differant kinds of waves...
A: Sound
A: Heat
A: Microwave
A: Water
A: Radioactive

Q. Name 3 ways you used waves this morning?
A. Talking, shower, breakfast
A. I waved bye to my Mom
A. I heard stuff, there were waves in my sink, and I listened to the radio

Q. What causes these different waves?
A. Sound
A. Vibrations
A. Radio activityActivity
A. The moon's gravity

After discussing our answers with the group, we then paired off and had each pair go to a computer that had 3 crickets and a transfer ckicket. The lesson plan was very similar to June 3rds entry, with the exception of a new way to challenge them in the activity, which I believe was a huge improvement. Here's how it went...

"Intro to I.R."

Big Idea: Educating kids on how to program I.R. programs.

Dates: Wednesday, November 9th

Groups Participating: ALA blue dot crew

Attendance: about 15 kids and Crystal, Sammie and I

Materials:
Software: laptops, transfer cables, transfer crickets, 3 crickets at each laptop

Directions: Two activities. Both programs for these activities should be saved in most of the laptops, in the logoblocks files entitled "1st I.R. activity" and "2nd I.R .activity". The first activity lasted the longest and definately taught the kids the most...

Activity one: Through basic I.R. program displayed by the digital projector, have the kids program one of thier crickets to be "remote" and program the other cricket to be "reciever". The program for the remote cricket should read, "Loop, send I.R. every 1 second (10)". The reciever cricket's program should read, "Loop, if new I.R., note 56". It's best that everyone's note that they program should be a different number so thier note can be distinguished from the other crickets. After everyone's 2 crickets were programmed, I handed out a worksheet with 7 different questions about various activities to try with these newly programmed I.R. crickets. After completing the activities, they wrote down thier observations. Here are the following questions and answers. Free free to cut and paste the questions to use as an intro activity again...

1) Q. AT WHAT DISTANCE IN FEET DO YOUR CRICKETS STOP COMMUNICATING?
A.9 feet
A. Around 8 feet long

2) Q. CAN YOUR CRICKETS SPEAK TO ONE ANOTHER BY REFLECTING IN A MIRROR?
A. yes

3) Q. CAN YOU FIND OTHER OBJECTS THEY CAN SPEAK TO ONE ANOTHER THROUGH REFLECTION?
A. computer screen
A. silver bowl
A. coffee maker
A. yes

4) Q. HOW MANY SHEETS OF PAPER CAN YOUR CRICKETS SPEAK THROUGH?
A. 12 sheets
A. 13 sheets
A. 15 sheets

5) Q. WHAT OTHER SORT OF MATERIALS CAN YOUR CRICKETS SPEAK THROUGH? WHAT OBJECTS PREVENT IT? (Water? Glass? Soda? Plastic?)
A.plastic bags
A. window
A. chips
A. plastic bins

6) Q. TRY CROSSING PATHS WITH ANOTHER GROUP’S CRICKETS WHILE THEY TRY TO COMMUNICATE. DO THEY INTERFERE WITH ONE ANOTHER? IF SO, AT WHAT DISTANCE DO THEY STOP INTERFERING?
A. no

7) Q. USING THE TELEVISION REMOTE CONTROL POINTED TOWARD YOUR RECEIVING CRICKET, AT WHAT DISTANCE IN FEET DO THEY STOP COMMUNICATING?
A. 9 feet
A. 15 feet
A. The whole room long!


Activity two: Have the kids reprogram "remote" cricket to send a random value between 1 and 100 every second. Next program one "reciever" cricket to only beep when the sent values of 1 to 50 are sent, and a second reciever cricket to only beep the sent values of 51 and 100 are sent. Have the kids notice they never beep at the same time.

Skills: I.R. programming, understanding how I.R. waves are sent and work, understanding of how the crickets communicate

Associated Concepts: confidence in programming, working in pairs premotes cooperation

Best Part: The choas of the kids discovering. Lots of "Oh, cool!"'s.

Worst Part: None

Culminating Event: Nasc-I.R. races and ang I.R. chain reaction the lenth of the room with limited materials.

I was thrilled at the involvement and excitement, and how the lesson went overall. This is the first in a two part lesson for the intro to I.R. class, which I'll blog about next time, where we involved I.R. in the two challenges listed above under culminating events, which went awesome. Lookin forward to tellin you about it and posted some photos.

myles